
Social Media
How to Use Apple Passkey for X iPhone App for Passwordless Login
X, previously known as Twitter, has unveiled an enhanced login feature tailored for iPhone users within its application. With the introduction of passkeys for X, users can now streamline their login process, eliminating the necessity to manually input their password each time they access their accounts. Instead, individuals can authenticate using the Face ID or Touch ID functionalities.
Now, let’s delve into the steps for configuring passkeys within the X application on your iPhone.
Utilizing Apple Passkeys Instead of Passwords on iPhone, iPad, and Mac
Passkeys present a secure and user-friendly alternative to traditional passwords, offering a seamless passwordless sign-in experience across various platforms and applications.
Unlike passwords, which are susceptible to phishing attacks, passkeys leverage robust technology devoid of shared secrets, ensuring utmost Security.
Currently, the Apple ID passkey functionality for the X app is exclusively available to users in the United States. To enable and configure this feature on your iPhone, follow these simple steps:
1: Launch the X app and tap on your profile picture.
2: Navigate to Settings & Support > Settings and privacy.
3: Choose Security and account access > Security.
4: Activate the Passkey toggle under Additional password protection.
5: Enter your X app password and confirm.
6: Opt to Add a passkey and adhere to the on-screen prompts.
Once set up, you can effortlessly log in without inputting your password.
Deleting Passkey from X App on iPhone: A Step-by-Step Guide
If you find passkeys unsuitable for your needs, you can remove them. Follow these steps to delete the Passkey from X:
1: Follow steps 1-5 as outlined in the previous instructions.
2: Choose the option to Delete a passkey.
By following these steps, your Passkey will be successfully deleted.
Exploring the Features of Passkey
Passkeys operate as an exceptionally secure system by generating two cryptographic keys, one stored locally and the other on X. This linkage ensures that the Security of your account is intricately tied to the Security of your device. Consequently, the need to manually input your password every time is eliminated. Here are some key features of passkeys:
1: Enhanced Security: Provides heightened security measures.
2: User-Friendly Authentication: Offers a convenient and user-friendly authentication process.
3: Simplified Sign-In: Streamlines the sign-in procedure.
4: Integration with Multi-Factor Authentication (MFA): Seamlessly integrates with multi-factor authentication for added security layers.
5: Dynamic Passkeys: Facilitates the generation of dynamic passkeys for temporary access.
Advantages of Using Passkey for Login
Passkeys streamline and expedite the login process, sparing you the need to remember or reset passwords across various devices. By utilizing a passkey, your account is bolstered with enhanced security measures.
If your iPhone is lost or stolen, you can access your X account using a password instead of an Apple passkey. Passkey recovery can be facilitated through iCloud keychain escrow.
Setting up a passkey for X on your iPhone is now a straightforward process, enabling secure browsing within the app.
Feel free to share your inquiries or suggestions in the comments section. Stay tuned for more cutting-edge tech insights.
How Passkeys Work
Apple Passkey is a revolutionary feature offered by Apple that is designed to enhance Security and streamline the login process for various applications and websites on your iPhone. This innovative solution replaces traditional passwords with hidden cryptographic keys stored securely on your device using iCloud Keychain. Let’s delve deeper into the technical aspects of Apple Passkey and understand how it works to provide a seamless and secure authentication experience.
When you generate a passkey for a specific app or website, your iPhone stores this Passkey securely using iCloud Keychain. This Passkey comprises two separate keys, forming what is known as a key pair. One key is public and registered with your app or website, while the other is private and remains stored only on your mobile device.
The critical pair plays a crucial role in the authentication process between your device and the app or website. When you attempt to log in, the Passkey facilitates the authentication by seamlessly exchanging information between your device and the server. This exchange is encrypted end-to-end, ensuring that sensitive data remains protected from prying eyes.
One of Apple Passkey’s key advantages is its simplicity and manageability compared to traditional passwords. Instead of remembering complex passwords, users can authenticate using facial or fingerprint recognition, making the login process quick and effortless.
Moreover, passkeys are designed to be highly secure, thanks to the robust encryption techniques employed in their creation. Each set of passkeys is unique to a specific app or website, meaning they cannot be used to access unauthorized services. Additionally, since the private key remains stored solely on your device, there is no risk of it being leaked or compromised.
Furthermore, passkeys protect against phishing attacks and other hacking attempts. Their cryptographic nature makes them resistant to brute-force attacks, ensuring that your accounts remain safeguarded at all times.
In summary, Apple Passkey revolutionizes the authentication experience by replacing traditional passwords with secure cryptographic keys. By leveraging iCloud Keychain and advanced encryption techniques, passkeys offer a seamless and secure login process for users, enhancing both convenience and Security in the digital realm.
A Game-Changer in Authentication
Apple Passkey represents a paradigm shift in authentication methods, eliminating the need for traditional passwords and Enhancing Security through advanced encryption techniques. By leveraging the power of biometric authentication and secure enclaves, Apple Passkey offers users a frictionless login experience while ensuring robust protection against unauthorized access.
The Benefits of Using Apple Passkey on X iPhone App
Enhanced Security: With Apple Passkey, users can bid farewell to the vulnerabilities associated with traditional passwords, such as phishing attacks and password breaches. Integrating biometric authentication adds an extra layer of Security, making it virtually impossible for malicious actors to compromise user accounts.
Seamless User Experience: Say goodbye to the hassle of remembering and typing lengthy passwords. Apple Passkey simplifies the login process, allowing users to access the X iPhone App with just a touch or glance, providing unparalleled convenience without sacrificing Security.
Cross-Device Compatibility: Whether you access the X iPhone App on your iPhone, iPad, or Mac, Apple Passkey ensures a consistent and effortless login experience across all your Apple devices, streamlining your interactions with the application.
Getting Started: Setting Up Apple Passkey for X iPhone App.
Ensure Compatibility: Before diving into the setup process, ensure that your iPhone supports Apple Passkey and that the X iPhone App has integrated this feature into its authentication system.
Enable Apple Passkey: Navigate to the settings menu on your iPhone and select “Passkey & Security.” From there, enable Apple Passkey and follow the on-screen instructions to set up your biometric authentication preferences.
Integration with X iPhone App: Launch the X iPhone App and navigate to the login screen. Look for the option to use Apple Passkey and follow the prompts to link your device’s biometric data with your account.
Verify Identity: For added Security, you may be prompted to verify your identity using Touch ID, Face ID, or device passcode. Once verified, you’ll gain instant access to the X iPhone App without a traditional password.
Best Practices for Optimizing Apple Passkey Usage
Regularly Update Your Devices: To ensure the highest level of Security, keep your iPhone and other Apple devices up to date with the latest software updates. These updates often include critical security patches and enhancements to Apple Passkey functionality.
Enable Two-Factor Authentication (2FA): While Apple Passkey provides robust Security, enabling 2FA adds an extra layer of protection to your accounts. Consider enabling 2FA for X iPhone App to further bolster your account security.
Practice Caution: While Apple Passkey offers unparalleled convenience, remaining vigilant against potential security threats is essential. Avoid sharing your biometric data or device passcode with anyone, and immediately report any suspicious activity related to your X iPhone App account.
Frequently Ask Questions
What is an Apple Passkey, and how does it work with the X iPhone app?
An Apple Passkey is a secure authentication method that eliminates the need for traditional passwords. When used with the X iPhone app, it allows users to log in without entering a password, enhancing Security and convenience.
How do I set up an Apple Passkey for the X iPhone app?
To set up an Apple Passkey for the X iPhone app, follow these steps:
Open the X app and navigate to your profile settings.
Access the security settings and choose to enable the Passkey feature.
Follow the on-screen instructions to create and set up your Passkey.
Can I use Apple Passkey on multiple devices with the X app?
You can use your Apple Passkey for the X app across multiple devices linked to your Apple ID. This provides seamless and secure access to your X account without passwords.
What should I do if I forget my Apple Passkey for the X app?
If you forget your Apple Passkey, you can still access your X account using alternative methods, such as a password. Additionally, you may utilize iCloud keychain escrow to recover your Passkey.
Is using an Apple Passkey for the X app secure?
Yes, using an Apple Passkey for the X app enhances Security by eliminating the vulnerabilities associated with traditional passwords. The Passkey system is built on robust cryptographic technology, ensuring a secure login experience.
Can I disable or remove my Apple Passkey for the X app?
Yes, you can disable or remove your Apple Passkey for the X app. Access the security settings within the app and follow the prompts to disable or remove the Passkey feature.
Conclusion
Apple Passkey represents a groundbreaking leap forward in authentication technology, offering users a secure, convenient, and password-free login experience. It sets a new standard for authentication in the digital age by harnessing the power of biometric authentication and robust encryption techniques. By following the guidelines outlined in this article, users can harness the full potential of Apple Passkey for seamless and secure access to the X iPhone App, unlocking a future where passwords are a thing of the past.
Comprehending the dynamics of social media is paramount for bolstering your business’s online visibility. Platforms like Instagram offer invaluable opportunities to exhibit your products, expand your customer base, and engage with your audience.
Nevertheless, situations may arise where temporarily deactivating your Instagram business account becomes imperative due to unforeseen circumstances.
This guide will elucidate the process of accomplishing this task effectively.
What Does Account Deactivation Mean On Instagram?
Distinguishing between a deactivated and a deleted Instagram account is crucial.
A deactivated account remains intact but is rendered inaccessible to other users. The account becomes unsearchable, unmodifiable, and invisible to the public during deactivation. However, all content, interactions, and data associated with the account are preserved but invisible.
On the other hand, a deleted account and all its contents are permanently removed from the platform. Once deleted, the account and its associated data are irretrievable.
Understanding this disparity is essential for making informed decisions regarding managing your Instagram presence.
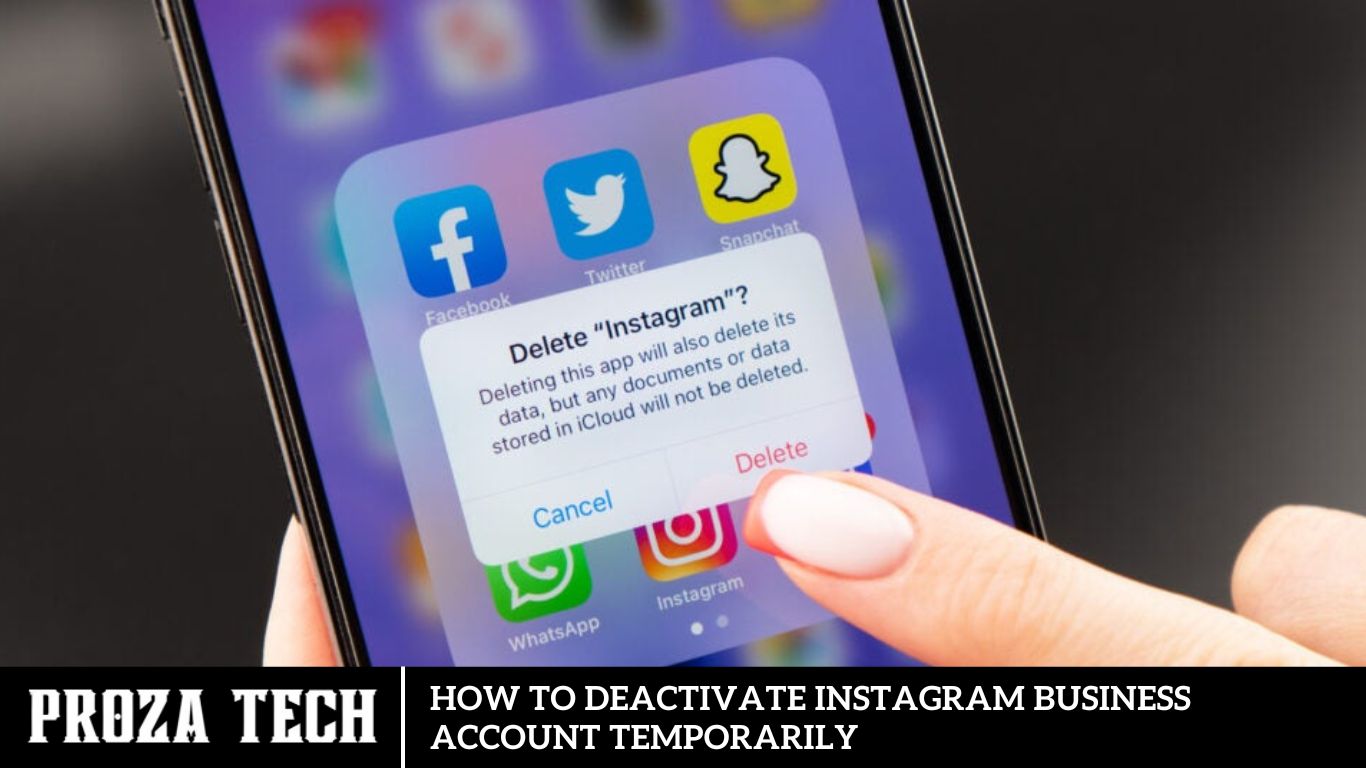
How to Deactivate Instagram Business Account Temporarily
Deactivating your Instagram business account offers the convenience of keeping it inactive without resorting to permanent deletion until you’re ready to resume using it.
This action effectively conceals your posts, comments, and likes from other users while rendering your profile unsearchable.
You can seamlessly execute this process through the Instagram mobile application or via the web interface on your PC.
Here’s a step-by-step guide to temporarily deactivate your account:
- Launch the Instagram app and navigate to your profile page. Tap on the three-line icon located at the top-right corner.
- Proceed by tapping “Settings and privacy,” then select “Accounts Centre.”
- In the Accounts Centre, tap “Personal Details” and choose “Account Ownership and Control.” Then, select “Deactivation or Deletion.”
- Select the specific account you wish to temporarily deactivate from the options presented. Tap on “Deactivate account” and then proceed by tapping “Continue.”
- Confirm your action by entering your password and selecting a reason for deactivation. Finally, tap on “Deactivate Account” to complete the process.
How to Disable Instagram Account Temporarily
Taking a hiatus from social media can have a beneficial impact on your mental and overall well-being. We offer a comprehensive guide on temporarily deactivating your Instagram account to assist you in this endeavor.
How to Temporarily Disable Your Business Account on Instagram
Opting for a private account is the optimal method for temporarily disabling your Instagram business account. This approach allows you to retain access to your content, followers, and engagement without the risk of losing them entirely.
Troubleshooting Deactivation Issues
Encountering difficulties in deactivating your Instagram account can sometimes stem from technical glitches within the app. Utilizing the Instagram web version provides an alternative route to permanently delete or deactivate your account. Should challenges persist, don’t hesitate to contact Instagram’s support team for assistance.
Understanding the Effects of Deactivation on Your Followers
When you deactivate your Instagram account, followers will no longer see your profile, posts, or stories. However, they will regain access to your content upon reactivation and resume following you.
Empowering Your Management of Online Presence
With the knowledge of how to deactivate your Instagram business account, you can manage your account’s online presence more flexibly according to your needs.
We Welcome Your Feedback
Should you have any questions or suggestions, please share them with us in the comments section below.
Stay Connected with TechCult
For more insightful guides like this, stay tuned to TechCult.
How To Deactivate Your Instagram Business Account
Occasionally, it becomes necessary to temporarily remove your Instagram account from the public eye. Fortunately, you don’t have to delete your entire Instagram account to achieve this.
Whether you’re managing an individual, company, or creator account, we’re here to assist you in your discreet endeavors. We’ll provide a concise, step-by-step guide on deactivating your Instagram account.
Understanding the Implications
Even temporarily, deactivating your Instagram Business account can affect your online presence and marketing efforts. Here, we’ll explore how deactivation might affect your visibility, engagement metrics, and follower relationships.
How do you turn off a business account on Instagram?
Instagram offers many remarkable features tailored for businesses, with many of them being entirely complimentary. One such feature is its analytics tool, which empowers users to assess post performance and monitor business growth seamlessly. Additionally, the platform provides paid features that can immensely benefit those who have established a robust presence on Instagram.
However, despite the array of advantages, there are instances where individuals may contemplate deactivating their Instagram business accounts. Let’s delve into some of the reasons that might prompt such a decision and evaluate whether they warrant shutting down your account.
Considerations Before Deactivating Your Account
Before you proceed with deactivation, it’s essential to consider the potential consequences and alternative strategies. This section will discuss alternative options, such as scheduling posts in advance, maintaining communication with followers, and planning a reactivation strategy.
Possible Reasons for Turning Off a Business Account on Instagram
Are you contemplating deactivating your Instagram business account? There could be various reasons behind such a decision, ranging from privacy concerns to a shift in business focus. Let’s explore common motivations for turning off your account and the corresponding steps.
Privacy Concerns
You may find Instagram’s privacy policy too lax or restrictive. Businesses often rely on access to detailed follower information to better understand their audience’s preferences. However, with features like the ‘lock profile’ option, gaining insights into your audience’s behavior may require following individual accounts, which can take time and effort. This privacy shift might be a significant factor driving businesses to deactivate their accounts.
Launching a New Business
If you’ve closed one business and launched another in its place, start fresh on Instagram rather than revamping your existing business account. While it is technically feasible to update your account details, many find it simpler to create a new account altogether.
Taking a Break
Instagram’s captivating content can sometimes distract from business priorities, leading individuals to consider a temporary break from the platform. Temporarily deactivating your account can provide the necessary pause to refocus on your business objectives without the constant allure of social media.
Not Meeting Expectations
Despite its appeal, Instagram may need to align with your business goals or resonate with your target audience. In such cases, it’s reasonable to deactivate your account if it’s not contributing positively to your business endeavors.
Methods to Deactivate a Business Account on Instagram
If you’ve decided to deactivate your Instagram business account, there are a few options to consider based on your intentions:
Switch to a Personal Account:
Switching to a personal account is a straightforward solution if you still want to remain active on Instagram but no longer require the business features. Here’s how:
Navigate to your Instagram profile from the mobile app.
Tap the three parallel lines at the top right and select ‘Settings.’
Under ‘Settings,’ go to ‘Account.’
Choose ‘Switch account type’ and then ‘Switch to personal account.’
Temporarily Deactivate Business Account:
If you plan a temporary hiatus from Instagram and intend to return later, you can temporarily deactivate your account. Follow these steps:
Tap ‘Edit Profile’ on your profile page near the top left.
Scroll to the bottom and select ‘Temporarily disable my account.’
Provide a reason for deactivating the account.
Enter your password to confirm the action.
Permanently Delete Business Account:
For those who are sure of their decision to permanently delete their business account, this option ensures the account is removed from the platform permanently. Here’s how:
- Visit the ‘Delete your account’ page using a web browser.
- Select the reason for deletion.
- Enter your password and submit the request.
- By understanding your reasons for deactivation and choosing the appropriate method, you can effectively manage your Instagram presence in alignment with your business objectives.
Frequently Asked Questions
Why would I want to temporarily deactivate my Instagram Business account?
Temporarily deactivating your Instagram Business account can be beneficial for various reasons, such as undergoing rebranding efforts, taking a social media break, or addressing operational changes within your business. It allows you to pause your online presence without losing your account or content permanently.
Will deactivating my Instagram Business account affect my followers or engagement metrics?
Yes, temporarily deactivating your account may impact your followers and engagement metrics. While your account is deactivated, your profile, posts, and content will be temporarily hidden from public view, potentially leading to decreased engagement metrics such as likes, comments, and follower growth.
Can I reactivate my Instagram Business account after deactivation?
You can reactivate your Instagram Business account anytime by logging back into your account using your username and password. Once reactivated, your profile, posts, and content will become visible to your followers and the public again.
Will my account data be lost if I temporarily deactivate my Instagram Business account?
No, temporarily deactivating your Instagram Business account does not result in data loss. Your account information, including followers, posts, and settings, will be preserved during deactivation. However, it’s essential to note that any scheduled posts or active advertising campaigns may be affected.
How long can I deactivate my Instagram Business account?
Instagram allows you to deactivate your account for as long as you need. Whether you choose to deactivate your account for a few days, weeks, or months, you can reactivate it anytime by logging back into it.
Will my Instagram Business account be visible to others while deactivated?
No, your Instagram Business account will not be visible to others while it is deactivated. Your profile, posts, and content will be temporarily hidden from public view until you reactivate your account.
Conclusion
Temporarily deactivating your Instagram Business account is a strategic decision that requires careful consideration and planning. Following the steps outlined in this guide and staying informed about best practices, you can effectively navigate the deactivation process while minimizing disruptions to your online presence. Remember to communicate openly with your audience, monitor relevant metrics, and prepare for seamless reactivation when the time is right.
Protecting privacy and ensuring security is paramount, especially in today’s digital age, where platforms like Instagram are vital hubs for social interactions. Safeguarding your account from unauthorized access is imperative.
A proactive step towards bolstering security is regularly reviewing your login history. This practice helps you verify that only approved devices have accessed your account. By monitoring login activity, you can promptly detect suspicious logins from unapproved devices and take appropriate action.
Curious about how to perform these essential security checks? Our blog today is dedicated to guiding you through the process step by step. Let’s delve into it.
How to Check and Remove Instagram Login Devices on Mobile App
Logging into your Instagram account from someone else’s device and forgetting to log out can pose a significant security risk. However, Instagram now offers an option to monitor login activity and remove unauthorized devices to prevent potential security breaches.
Here’s a step-by-step guide on how to manage your login activity:
- Open the Instagram app and navigate to your profile page.
- Access the menu by tapping the three horizontal lines at the top right corner.
- From the menu, select “Settings and Privacy,” then proceed to “Accounts Center,” and choose “Password and Security.”
- Next, select your Instagram account and tap “Where you’re logged in” to view the complete list of devices that have accessed your account.
- Identify the device you wish to remove from the list, tap on it, and then select “Log out” to revoke access from that device.
- By following these steps, you can effectively monitor and manage the devices that have access to you.
Understanding Instagram Login Devices
Before delving into checking and removing login devices on Instagram, it’s essential to grasp what these devices are. Instagram login devices refer to the various smartphones, tablets, computers, and other gadgets used to access your Instagram account. Each time you log in to your account from a new device, it gets added to the list of authorized login devices.
How to Enable Login Requests
Adding an extra layer of security, Instagram now offers login requests that notify you whenever someone attempts to access your account from a new device or location. These requests prompt you to approve or deny the login attempt, enhancing your account’s security.
Here’s how you can enable login requests on both mobile devices and PCs:
Option 1: On Android and iPhone
- Open the Instagram app and navigate to your profile page.
- Access the menu by tapping the three horizontal lines at the top right corner.
- Select “Settings and privacy,” then proceed to “Accounts Center.”
- Choose “Password and security,” followed by “Two-factor Authentication.”
- Tap on your account and select your preferred security method.
- Follow the on-screen instructions to enable login requests.
Option 2: On PC
- Open Instagram and go to the Password and Security menu in the Account Center.
- Click on “Two-factor authentication,” select your account, and choose your preferred security method.
- Follow the on-screen instructions to enable login requests.
To log out of Instagram on all devices for security purposes, you have several methods:
Method 1: Via Settings
Follow the steps outlined in the “How to Check and Remove Instagram Login Devices on Mobile App” section and repeat them to log out of your account from all devices.
Method 2: Change Password
- Open Instagram, navigate the Settings and Privacy menu, and tap Accounts Center.
- Select “Password and security,” followed by “Change password” under Login & recovery.
- Choose your account, set up a new password, and click “Change Password” to log out of all devices.
Method 3: Remove Login Screen
- Firstly, log out from the Instagram app.
- On the login screen, tap the Settings icon and then your account username.
- Tap on “Remove Profile” to remove the profile from the current device, which will also log you out from all other devices.
- By following these methods, you can effectively manage your Instagram account’s security and ensure that only authorized devices have access.
What are Login Devices
Login devices encompass the array of devices utilized to access your Instagram account, spanning smartphones, tablets, computers, and other logged-in devices. Instagram meticulously maintains records of these devices for security reasons, empowering you to oversee and regulate them effectively. By conscientiously reviewing and removing login devices, you fortify the security of your Instagram account, thwarting unauthorized access and preserving vigilant control over its integrity.
Step-by-Step Guide to Checking Instagram Login Devices
Now that you understand the importance of monitoring your Instagram login devices let’s walk through the process: a. Open the Instagram App: Launch the Instagram app on your mobile device or visit the Instagram website on your computer and log in to your account. b. Navigate to Settings: Once logged in, tap on your profile picture in the bottom right corner (mobile app) or click on your profile icon in the top right corner (website) to access your profile. c. Access Account Settings: From your profile, tap on the three horizontal lines in the top right corner (mobile app) or click on the gear icon next to “Edit Profile” (website) to open the Settings menu.d. Select Security: In the Settings menu, scroll down and select the “Security” option to view security-related settings. e. Choose Login Devices: Within the Security settings, look for the “Login Devices” or “Active Sessions” option. Tap on it to view a list of devices that have recently accessed your Instagram account.
Why Check and Remove Login Devices
Regularly checking and removing login devices from your Instagram account is imperative for several compelling reasons:
Security Enhancement
Consistently reviewing and managing login devices is a critical safeguard for your Instagram account’s security. By promptly identifying and eliminating any unauthorized devices, you can thwart potential unauthorized access attempts, thus safeguarding your personal information and privacy.
Account Safeguarding
If you suspect unauthorized access to your account, checking and removing login devices empowers you to take immediate action to secure your account and mitigate any further unauthorized activities. This proactive approach aids in fortifying the protection of your account against potential breaches.
Peace of Mind Assurance
Ensuring that only trusted devices can access your Instagram account fosters peace of mind. Regularly monitoring and managing login devices instills confidence in the security measures implemented, ensuring that you remain in control and uphold the integrity of your account.
By prioritizing the routine examination and removal of login devices, you actively fortify your Instagram account’s security, protection, and peace of mind.
Frequently Asked Questions
Why should I check and remove Instagram login devices?
Checking and removing Instagram login devices is essential for maintaining the security and privacy of your account. By regularly monitoring the devices with access to your account, you can identify and remove any unauthorized access attempts, minimizing the risk of security breaches or privacy violations.
Can I check my Instagram login devices from a computer?
You can check your Instagram login devices from the mobile app and website. To view them, log in to your account, access the Settings menu, and follow the steps outlined.
How often should I check my Instagram login devices?
It’s recommended to check your Instagram login devices regularly, especially after logging in from a new device or noticing any suspicious activity on your account. By monitoring your login devices periodically, you can stay proactive in protecting your account security.
Conclusion
Taking proactive steps to monitor and manage your Instagram login devices is essential for ensuring the security and privacy of your account. By following the steps outlined in this guide, you can effectively identify and remove unauthorized access attempts, thereby enhancing the overall security of your Instagram account. Stay vigilant, stay secure!

Instagram stands out as a leading social media platform, boasting an impressive user base that exceeds 1 billion active users monthly. To uphold the Security of user accounts, Instagram implements two-factor authentication, relying on SMS codes dispatched to registered phone numbers. Nonetheless, occasional lapses occur where Instagram fails to deliver these crucial SMS codes, impeding users from logging in or accessing their accounts. Undoubtedly, this situation can be exasperating; nevertheless, you can employ various troubleshooting strategies to rectify the issue of Instagram’s failure to dispatch SMS codes.
Instagram Not Sending SMS Codes? 9 Ways to Fix It
This comprehensive guide will explore the top solutions to address Instagram’s failure to send the SMS verification code.
Method 1: Ensure Network Connectivity and Restart Device
Begin by verifying the stability of your phone’s internet connection. Cellular reception or WiFi connectivity issues can help Instagram deliver the SMS code. Here’s what you can do:
- Relocate to an area with better cellular reception if using mobile data.
- Connect your phone to a stable WiFi network.
- Activate Airplane mode for 30 seconds, then deactivate it to reset the network connection.
- Restart your phone.
- Update your device’s operating system and Instagram app to the latest versions.
Once you’ve confirmed your connectivity status, attempt to request the SMS code from Instagram again. Often, a simple restart or network reconnection can resolve temporary glitches.
Method 2: Verify Your Phone Number
Suppose you still have access to your Instagram account on other devices, such as a computer or a different mobile device. In that case, you can ensure that the phone number linked to your Instagram account is accurate and capable of receiving SMS messages. Follow these steps to check and update your phone number on Instagram:
- Navigate to your Instagram Profile.
- Tap the Menu icon (typically depicted as three horizontal lines).
- Select Settings > Accounts Center > Personal details.
- Tap on Contact info, then tap on your phone number.
- Choose to either Confirm or Delete your current number.
- Enter your current phone number or add a new one as necessary.
Once you’ve verified that your phone number is correct, proceed to request the SMS code again.
Method 3: Utilize Alternative Authentication Method
If you have enabled access to alternative authentication methods, such as authentication apps or backup codes, consider using those instead of SMS for Instagram login.
- On the Instagram login screen, select “Get help logging in.”
- Opt to log in via the Authentication App or Backup Codes.
- Follow the prompts to gain access to your account.
Using alternative authentication methods mitigates reliance on SMS codes for login.
Method 4: Check for Instagram Server Outages
Sometimes, the issue may not stem from your end but could be due to an outage on Instagram’s servers. Monitor Instagram’s status page or platforms like Downdetector to see if other users are experiencing similar problems.
If an Instagram outage is ongoing, you may need to wait until Instagram engineers resolve the server issues before SMS codes can be received. Continue attempting to log in after some time.
Method 5: Update Instagram to the Latest Version
An outdated Instagram app version might also hinder the proper sending of SMS codes. Ensure you have the latest Instagram version installed on your Android or iOS device to address any app-related bugs that could impede SMS delivery.
- For Android devices: Open the Google Play Store, search for Instagram, and tap “Update” next to Instagram to upgrade to the latest version.
- For iPhone: Access the App Store, tap your profile icon, scroll to view pending Instagram updates, and tap “Update.”
- Updating the app resolves known SMS issues patched in newer Instagram releases.
Method 6: Disable VPN or Proxy Settings
Active VPN services or proxy servers could interfere with Instagram’s ability to send SMS codes. As a troubleshooting step, temporarily turn off any active VPN apps and proxy settings to assess if SMS verification functions properly without them enabled.
You can re-enable VPN or proxy settings after successfully accessing your Instagram account.
Method 7: Unblock Instagram’s SMS Number
It’s common for users not to receive SMS codes from Instagram because they have blocked the originating phone number. Instagram typically sends codes from the phone numbers “32665” or “40591.” Review your blocked numbers list and unblock these numbers.
- For iPhone: Navigate to Settings > Messages > Blocked Contacts and unblock “32665” if present.
- For Android: Open the Phone app, tap the Menu (three dots), go to Settings > Blocked numbers, and unblock “32665” if present.
- Unblocking the number facilitates the delivery of Instagram codes to your SMS inbox.
Method 8: Clear Instagram App Cache and Data
A corrupted cache or data within the Instagram app can obstruct the delivery of SMS codes. Clearing this data prompts the app to resynchronize properly with Instagram’s servers.
For Android:
- Access Device Settings > Apps > Instagram > Storage.
- Tap “Clear Cache” and “Clear Data.”
For iPhone:
- Press and hold the Instagram icon until icons begin to shake.
- Tap the X icon to delete the app.
- Reinstall Instagram from the App Store.
- Clearing cache and data resolves Instagram errors, preventing SMS code delivery.
Method 9: Contact Instagram Support
If none of the above solutions prove effective and you still aren’t receiving SMS codes from Instagram, you’ll need to contact their support team for further assistance.
Some avenues to contact Instagram support include:
- In-app support: Navigate to your Instagram Profile > Menu > Settings > Help > Contact Us and complete the form.
- Twitter: Tweet to @Instagram with your issue and username.
- Facebook: Message Instagram’s Facebook page detailing your problem.
- When contacting support, provide comprehensive details regarding when the issue started and the troubleshooting steps you’ve attempted. Support should respond with tailored fixes or escalate the SMS issues as necessary.
Understanding the Importance of SMS Code Verification on Instagram
Before delving into the solutions, it’s crucial to understand why Instagram employs SMS code verification as part of its login process. SMS code verification adds an extra layer of Security to your account, helping to prevent unauthorized access and safeguarding your personal information. When you attempt to log in to your Instagram account from a new device or location, Instagram sends a 6-digit code to your registered phone number via SMS. You must then enter this code to verify your identity and gain access to your account.
Common Causes of Instagram Not Sending SMS Codes
You may encounter the issue of Instagram not sending SMS codes for several reasons. Some of the most common causes include:
Seven ways to troubleshoot if Instagram is not sending SMS authentication codes
If you encounter difficulties receiving an SMS code from Instagram, you might need to explore an alternative form of two-factor authentication. Additionally, ensure that your phone isn’t in “Do Not Disturb” mode and that Instagram’s service is operational.
Instagram employs various measures in its ongoing effort to outpace hackers and cybercriminals, prioritizing safeguarding user identities and restricting access solely to authorized individuals. Among these measures is the issuance of SMS codes for two-factor authentication.
However, encountering a situation where Instagram fails to send an SMS code can be frustrating, potentially resulting in being locked out of your account. Remain calm and consider the following seven troubleshooting methods to address this issue.
Make sure you are using the correct phone.
If you find yourself waiting for an SMS code without receiving it, a common issue may arise if you use a different phone or have changed your phone number since configuring two-factor authentication. When transitioning phones, it’s easy to overlook all the devices and applications tied to an old number. However, there’s still hope; Instagram prompted you to set up an email address during the two-factor authentication setup. Additionally, you might have enabled two-factor authentication using an authenticator app.
You should have at least one alternative method to regain access to your account. Once you’ve successfully logged in, remember to update your two-factor authentication settings and phone number promptly. To accomplish this, launch the Instagram app, tap your account icon at the bottom, select the three-line Menu at the top, choose Settings, tap Security, and select Two-factor authentication to make the necessary adjustments.
How to Fix Instagram Not Sending SMS Codes in 2024
Need help logging into your Instagram account because your phone does not have the 6-digit confirmation code? This issue is relatively common and can stem from various factors. Fortunately, there are steps you can take to resolve it. In this article, I’ll guide you through fixing the error message “Instagram not sending SMS Code.”
Instagram presents users with myriad error messages, ranging from “Action Blocked” to “Instagram Account Suspended.” Among these, the issue of Instagram not sending the SMS code is a frequent concern, which I’ll address here.
Are you still waiting for the crucial code from Instagram to facilitate your login?
Numerous factors could contribute to this delay, and I’ll meticulously dissect each one step by step.
I understand the frustration accompanying the inability to access your Instagram account when needed.
Primarily, Instagram utilizes confirmation codes as part of its security protocol to verify your identity during the login process.
However, a scenario in which Instagram fails to dispatch an SMS code can indeed lock you out of your account, leaving you in a prolonged state of waiting.
But fear not; I’m here to offer a potential solution to address the issue of Instagram not sending SMS codes.
Allow me to guide you through the process of swiftly resolving this predicament.
Frequently Asked Questions
Why am I not receiving the SMS code from Instagram?
You need to receive the SMS code from Instagram for several reasons. Common causes include network connectivity issues, outdated app versions, server problems, incorrect phone numbers, or blocked SMS numbers.
What should I do if Instagram’s servers are down?
If Instagram’s servers are down, you may experience issues with receiving SMS codes. In such cases, you must wait until Instagram resolves the server issues. You can monitor Instagram’s official website or social media platforms for updates on server status.
Why is my SMS code from Instagram being blocked?
Your SMS code from Instagram may be blocked if you’ve inadvertently blocked Instagram’s SMS number. To unblock it, check your phone’s blocked numbers list and remove any restrictions on Instagram’s SMS number.
Can I use alternative authentication methods if Instagram is not sending SMS codes?
Yes, you can use alternative authentication methods, such as authentication apps or backup codes, if you can’t receive SMS codes from Instagram. Choose the alternative authentication option on the Instagram login screen and follow the prompts to gain access to your account.
Conclusion
Encountering the issue of Instagram not sending SMS codes can be frustrating, but with the proper troubleshooting steps, you can resolve the problem and regain access to your account. By following the step-by-step solutions outlined in this guide, you can identify and address the root cause of the issue, ensuring seamless login verification on Instagram. Remember to stay patient and persistent, and don’t hesitate to contact Instagram support if you need further assistance. With these solutions, you’ll be back to enjoying your Instagram experience in no time.

Top 10: Biggest innovations of 2023
From Breakthroughs in Quantum Computing to Advances in AI: Technology Magazine’s Top 10 Technology Innovations of 2023 In 2023, the...

Top 10 Technologies For The Classroom
The integration of technology in education is revolutionizing the classroom experience. With over 80% of the population owning smart devices,...

Top 10 biggest cloud providers in the world in 2023
Last year, global cloud infrastructure spending surged to an impressive $57 billion, underscoring the increasing reliance on cloud technology. Technology...

Vitamin E Health Benefits: A Comprehensive Guide
Vitamin E is more than just a nutrient—it’s a powerhouse antioxidant essential for maintaining our health and vitality. From protecting...
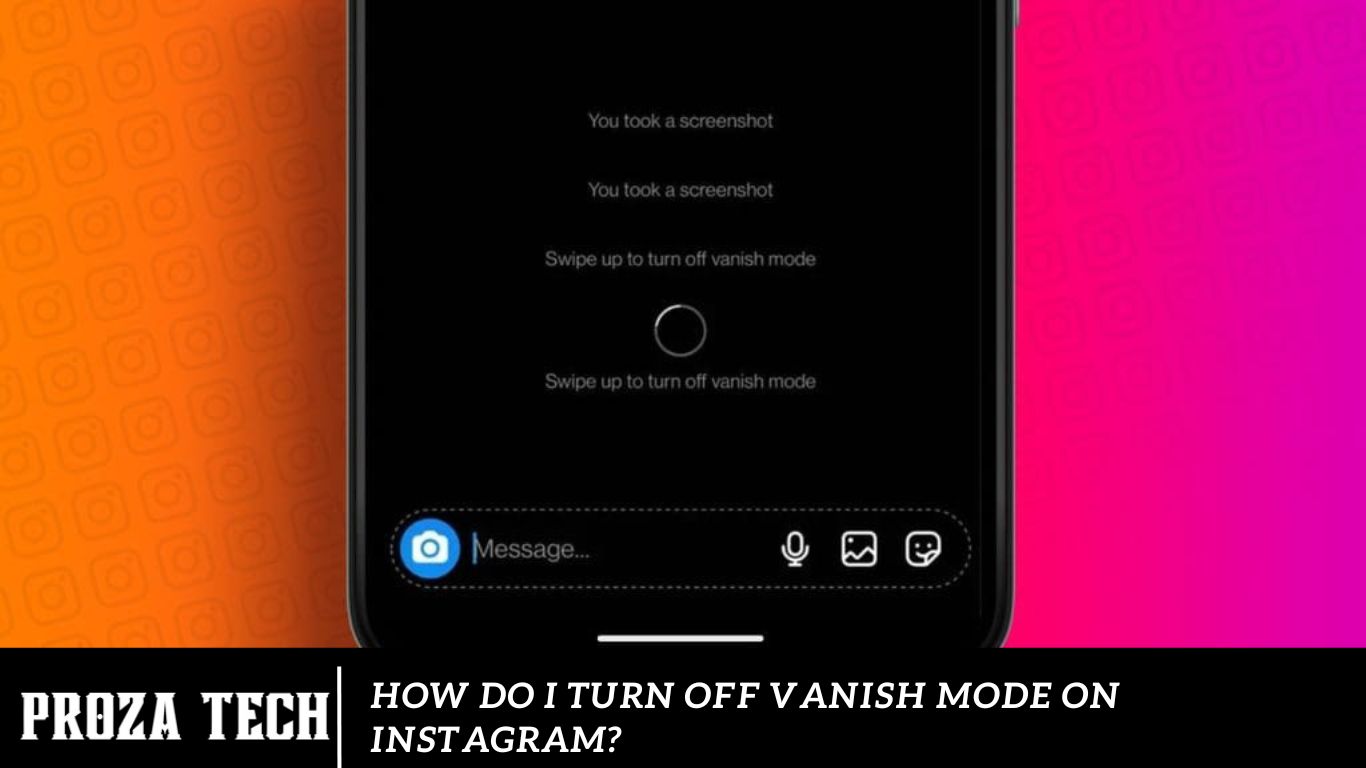
How do I Turn Off Vanish Mode on Instagram?
Disabling Vanish Mode on Instagram is straightforward. First, navigate to the chat where Vanish Mode is active. Swipe up from...
What Is the Difference Between Old Reddit and New Reddit
Reddit, the well-known online discussion platform, has seen substantial changes in recent years, notably with the rollout of a new...

Which One of The AI is Best Meta vs Gemini vs ChatGPT
Dynamic realm of artificial intelligence (AI), Meta, Gemini, and ChatGPT stand as prominent contenders, each offering distinct capabilities and applications...

Regulators to Consider $28bn Cisco Splunk Acquisition
Regulators in the European Union have established a deadline to decide on Cisco’s US$28 billion acquisition of cybersecurity firm Splunk....

Has Elon Musk Launched a Forex Platform Called Quantum AI
The association of Quantum AI with Elon Musk has ignited global interest in the platform. Across the trading community, discussions...

Top 10 industrial robotics companies in the world in 2023
From developing state-of-the-art robots to implementing advanced manufacturing technologies, we examine ten leading companies in industrial robotics. Industrial robotics is...
-
 AI4 months ago
How to Remove My AI From Snapchat (2023)
-
 AI4 months ago
Bing AI vs Google Bard – Which Search Engine Generative AI is the Best
-
 Entertainment4 months ago
Today Marks the End of Jim Ryan’s 30-Year Tenure at PlayStation
-
 Guides3 months ago
Apex Legends Alter Abilities Explained
-
 Entertainment4 months ago
Avoid The Latest Asus ROG Ally BIOS Update by All Means
-
 Guides3 months ago
Honkai Star Rail Codes (May 2024): Is there anything new
-
 Guides4 months ago
Understanding the Safety of Apple Vision Pro for Children’s Eyes
-
 Entertainment4 months ago
Is Sons of the Forest Coming in 2024 on PS4/PS5 & Xbox